As an Amazon Associate, I earn from qualifying purchases and other affiliate links. I only recommend products I’ve tried or researched.
- Home
- Skincare Guide
- Facial Masks
- Mask Mistakes
Facial Mask Dos & Don’ts: Mistakes You Might Be Making (And How to Fix Them)
Facial Mask Dos Don’ts: Hidden mistakes you might be making (and how to fix them).
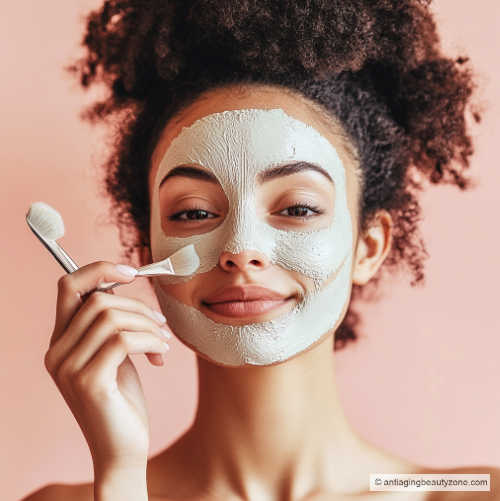
A face mask treatment should be a relaxing, skin-boosting treat, but let’s face it—sometimes it’s more hassle than help. From unexpected breakouts to lackluster results, it’s easy to wonder if you’re doing it wrong.

The truth? A few common mistakes often stand between you and that glowing complexion. In this guide, I’ll break down the key dos and don’ts and show you how to avoid these mistakes and get the most out of your facial treatment.
By the end, you’ll know exactly how to use face masks for the best results. Let's dive in ...
10 Common facial mask mistakes and fixes
These are some of the most common masking missteps—and what to do instead to get better results with every use.
1. Check your mask’s expiration date first
Yes, masks have a limited shelf life!
TBH, I've never checked the expiration date on mine! 🫨 That could be why sometimes I get great results and other times, not so great.
Store-Bought Masks:
Typically have an expiration date printed on the packaging. This is often located on the bottom or side of the container. Most should be used within 1-2 years of purchase. It's good to always check before buying and applying to ensure the product is still safe and effective.
DIY:
Homemade face treatments usually have a much shorter shelf life—generally 5-7 days if stored properly in the refrigerator. Without preservatives, their effectiveness and safety diminish quickly. Always check for any changes in smell, texture, or color before using.
Always monitor changes. If your mask changes in texture, smell, or color, discard it. These changes indicate that it may be ineffective or harmful, even if it's before the expiration date.
2. Apply face masks to dry skin, not wet
Applying a mask to damp skin can water down the ingredients, making them less effective. It often leads to uneven coverage and poor absorption—basically, you're not getting the full benefits.
For best results, start by washing your face with a gentle cleanser made for over-40 skin, then pat completely dry. This helps your mask work the way it’s supposed to—without interference from leftover water or residue.
3. Use exfoliating masks no more than once a week
Exfoliating masks are great to refresh your complexion and deep clean. But they can strip your natural oils, leading to irritation, redness, and sensitivity.
These masks are effective at removing dead skin cells but using them too often can disrupt your skin’s barrier, causing dryness and breakouts. Stick to the recommended dosage on the label or if using DIY homemade, use only once a week to keep your complexion balanced.
If you're still unsure, this guide breaks down the perfect mask schedule for every type—simple and stress-free.
4. Keep face masks away from your eye area
When applying a mask, leave at least a half-inch (about the width of your pinky finger) of space around the eyes. The thinner skin here is more prone to irritation, so getting too close can cause redness, dryness, or swelling.
Avoid applying to the under-eye or eyelids; instead, use products designed for this delicate area.
Keeping a safe distance protects your eyes and allows the mask to work effectively without causing side effects.
5. Always cleanse your face before masking
Applying a mask to an unclean face traps dirt and oil, making the mask less effective and potentially causing clogged pores and irritation. This not only wastes time and product but also risks unwanted skin issues.
To avoid these issues, cleanse your face with a gentle face wash before applying the mask. Avoid over washing or scrubbing too hard, as this can irritate your skin. Ensure your skin is dry to help the mask work effectively and prevent skin problems.
6. Choose a mask that fits your age and skin needs
Selecting the right mask isn’t just about matching it to your skin type; it’s also about addressing your skin’s age-related needs.
For instance, complexion over 40 might benefit from masks with collagen-boosting ingredients to help with elasticity and reduce signs of aging. While younger skin might need ones that focus on oil control or acne prevention.
Select one that fits both your skin type and age-related needs for best results. Get more details on customizing your facial mask routine for your age/skin type.
7. Apply serum and moisturizer after masking
Layering after a mask helps lock in its benefits and keeps your skin hydrated. Using the right serum and moisturizer boosts results and avoids irritation.
Apply Serums First
After rinsing, apply a hydrating serum with hyaluronic acid or peptides to boost moisture and enhance results. Avoid serums with strong ingredients like retinol or alpha hydroxy acids immediately after, as they may cause irritation.
Choose the Right Moisturizer
Choose a lightweight, fragrance-free, soothing moisturizer with ceramides or a gel-based moisturizer to hydrate without extra oil.
8. Change your mask routine with the seasons
Your skin’s needs shift throughout the year. In the winter, reach for rich, hydrating masks like sheet masks or creamy overnight formulas.
Masks made with ingredients like pearl powder can be especially helpful—they support moisture retention and help reinforce the skin barrier, which is key in colder, drier months.
In summer, switch to lighter options like gel, clay, or peel-off masks to absorb excess oil and keep skin clear.
9. Don’t fall for common face mask myths
Natural and DIY masks are often seen as safer, but let’s clear up some myths:
Myth: Natural Masks Are Always Safe
Truth: Natural doesn’t always mean gentle. Ingredients like essential oils or citrus extracts can irritate or burn sensitive skin. Always patch test first.
Myth: Store-Bought Ones Are Full of Chemicals
Truth: Many store-bought masks use clean, effective ingredients. Look for labels like “paraben-free” or “sulfate-free” to avoid common irritants.
Myth: Overnight Masks Are a Miracle Fix
Truth: Overnight masks are helpful but not cure-alls. Use them as directed to avoid clogged pores or irritation. Choose ones specifically for overnight use and follow label recommendations.
Myth: More Ingredients Mean Better Results
Truth: Fewer, targeted ingredients can be more effective and less irritating. For sensitive skin, avoid masks with long ingredient lists.
Just remember that both natural and store-bought masks have pros and cons. Knowing the facts helps you choose the right mask and avoid irritation.
10. Always do a patch test with new face masks
Doesn't matter how many times you've used masks, when trying a new one, always do a patch test. Trust me, I've learned the hard way!
Just take a small amount of the product and apply to a discreet area like behind your ear or on your inner forearm, wait 24 hours for any signs of irritation, and rinse off; if no adverse reactions occur, it's likely safe for your face.
Takeaway
Face masks can absolutely improve your skin—but only if you’re using them the right way. Avoiding these common mistakes means fewer breakouts, better results, and a routine that actually supports your skin instead of stressing it out.
And don’t forget: what you do after your mask matters too. Always apply a good moisturizer, and if it's daytime, follow up with sunscreen to prevent discoloration and age spots.
Freshly masked skin is more vulnerable to sun damage, so reach for a sunscreen with both SPF and a high PA rating. SPF helps prevent burning, but PA protection blocks the deeper UVA rays that cause wrinkles and age spots. Learn more about SPF and PA ratings here
Want to take your routine further? Check out my favorite tips for brightening dull skin. These glow-boosting habits are simple enough to do daily—and I think they really make a noticeable difference.
Next: Exotic Korean Face Masks at-Home
Want More?
I share quick routines, beauty tweaks, and what’s working for me — straight to your inbox. Join the Club and get this free Cheek Shaper Video.
About the Author:
Linda Robison is a Facial Fitness Specialist and the founder of Anti-Aging Beauty Zone. With decades of hands-on experience, she shares practical, natural ways to lift and brighten mature skin—without expensive or invasive treatments.
Before you go ....
Please tap on the💙in the bottom right corner if you found this page helpful.
FOLLOW ME FOR MORE TIPS:
SHARE OR SAVE FOR LATER:


